Rough Winter Ahead? Move Your Kale Indoors Now!
As the days shorten and a distinct chill creeps into the air, many gardeners begin to mourn the imminent end of their outdoor growing season. Frosts become more frequent, and even the hardiest plants start to show signs of surrender. If you're eyeing your thriving kale patch with a heavy heart, convinced its days are numbered, think again! With a little effort and the right approach, you can successfully prolong your harvest and enjoy fresh, homegrown kale throughout the deepest winter months. The secret?
Moving kale indoors for a rough winter. This strategic move isn't just about delaying the inevitable; it’s about ensuring a continuous supply of nutrient-rich greens when supermarket prices soar and quality dwindles.
Why Your Kale Deserves a Cozy Winter Retreat
The signs of a challenging winter can be subtle yet telling. Early, plummeting night temperatures, unexpected snow flurries even before December, or even old folklore indicators like the thickness of an animal's coat or the width of a woolly bear caterpillar's band (as some keen observers note!) can all point towards a particularly harsh season. While kale is renowned for its resilience, often able to withstand light frosts and even improve in flavor after a cold snap, extreme cold in mountainous regions or sustained sub-zero temperatures can eventually prove too much. Its lower leaves may begin to yellow, growth will slow significantly, and eventually, the plant will succumb.
The beauty of kale is its generous nature. It's a powerhouse of vitamins A, C, and K, along with essential minerals and antioxidants. Why let such a valuable, readily available food source disappear when winter hits? By bringing your outdoor kale plants inside, you're not just saving them; you're investing in your health and pantry, ensuring access to pesticide-free, budget-friendly greens. Imagine whipping up a fresh kale salad, adding crisp leaves to your smoothies, or sautéing vibrant greens for dinner, all while the world outside is blanketed in snow. It's a small effort for a significant payoff.
The Art of Transplanting: Moving Your Outdoor Kale Indoors
The primary method for saving your existing outdoor kale plants from the clutches of winter is careful transplantation. This process, while requiring a gentle touch, is incredibly rewarding.
Choosing the Right Container for Your Transplanted Kale
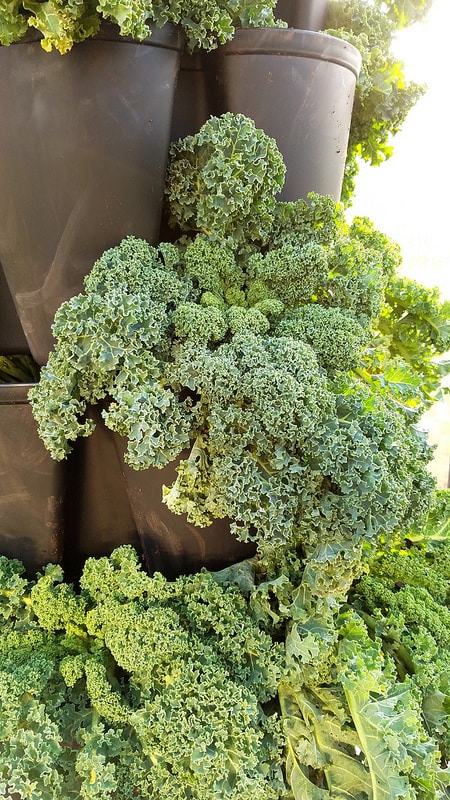
Before you even think about digging, select appropriate containers. Kale develops a moderately deep root system, so shallow pots won't cut it. Aim for pots that are at least 8-10 inches deep and wide, with ample drainage holes at the bottom. The size of your kale plant will also dictate the pot size; a larger, more mature plant will need more space. Terracotta pots work well for drainage, but plastic or fabric grow bags are also excellent choices, often being lighter and easier to move. If you're ambitious and have the space, vertical growing systems like tiered planters can efficiently house multiple plants, maximizing your indoor garden.
The Transplanting Process: Handle with Care
1.
Hydrate First: Water your outdoor kale patch thoroughly a day before you plan to transplant. This ensures the soil around the roots is moist and holds together better, reducing transplant shock.
2.
Gentle Digging: Choose a cool, overcast day if possible. Using a garden trowel or small shovel, begin to dig a wide circle around the base of your kale plant, at least 6-8 inches from the stem. Dig deeply, trying to get as much of the root ball as possible.
3.
Feel for Roots: As you dig, you might feel the shovel snagging on roots. Instead of forcing it, use your hands to gently trace the roots, trying to excavate them without ripping or tearing. The goal is to keep the root system as intact as possible.
4.
Lift and Place: Once you've loosened the plant sufficiently, carefully lift it from the ground. Support the root ball from underneath.
5.
Potting Up: Place a layer of fresh, high-quality potting mix at the bottom of your chosen container. Center the kale plant in the pot, ensuring the base of the stem is at the same level it was in the garden. Backfill around the root ball with more potting mix, gently firming it down to remove air pockets. Don't bury the stem too deeply, nor leave too many roots exposed.
6.
Initial Watering: Water the newly potted kale thoroughly until water drains from the bottom. This helps settle the soil and provides crucial hydration after the shock of being moved.
Post-Transplant Care and Location
After transplanting, your kale might look a bit droopy for a few days – this is normal transplant shock. Give it a week or two to recover. Place your potted kale in a location that receives abundant sunlight. A south-facing window, a patio door, or a sunroom are ideal spots. If natural light is limited, supplementing with a grow light for 10-14 hours a day will be essential for continuous growth.
Maintain consistent moisture in the soil, watering weekly or whenever the top inch of soil feels dry. Avoid overwatering, as this can lead to root rot. While kale is cold-hardy, it will thrive indoors in cooler room temperatures (around 60-70°F or 15-21°C), making it a perfect fit for a less-heated corner of your home or a cool greenhouse. For a comprehensive guide on keeping your harvests plentiful, check out our article on
Keep Kale Harvests Coming: Winter Indoor Growing Secrets.
Beyond Transplanting: Cultivating New Kale Indoors from Seed
While saving existing plants is fantastic, you don't need an outdoor garden to enjoy fresh winter kale. You can successfully start and grow kale indoors from seed, ensuring a truly year-round supply.
Optimal Growing Conditions Indoors
*
Light: Kale needs at least 4-6 hours of direct sunlight daily. If natural light is scarce, a full-spectrum LED grow light is a game-changer. Position it about 6-12 inches above your plants, adjusting as they grow, for 10-14 hours per day.
*
Temperature: Kale prefers cooler indoor temperatures, ideally between 60-70°F (15-21°C). It tolerates slightly warmer conditions but might bolt (go to seed) faster.
*
Watering: Keep the soil consistently moist but never soggy. Water when the top inch of soil feels dry to the touch.
*
Humidity: Average household humidity is usually sufficient. If your home is exceptionally dry, misting occasionally or placing a humidifier nearby can help.
*
Soil & Nutrients: Use a high-quality, well-draining potting mix. A good mix will often include perlite or vermiculite to improve aeration. Kale is a relatively heavy feeder, so consider incorporating a slow-release organic fertilizer at potting time or feeding with a diluted liquid fertilizer every 2-4 weeks.
Best Kale Varieties for Indoor Winter Growing
When
growing fresh kale all winter indoors, compact and fast-growing varieties are your best bet:
*
Dwarf Blue Curled Kale: Ideal for pots, producing dense, crinkly leaves.
*
Red Russian Kale: Known for its tender leaves, attractive reddish-purple stems, and quick growth.
*
Lacinato (Dinosaur) Kale: Offers long, narrow, dark green leaves with a slightly bumpy texture, perfect for regular harvesting.
*
Dwarf Siberian Kale: Thrives in cooler indoor conditions and is well-suited for smaller containers.
Always look for seed packets labeled "dwarf" or "container-friendly" if space is a premium. Start seeds in small trays, then transplant to larger pots once seedlings have a few true leaves.
Harvesting Your Winter Bounty & Troubleshooting
Whether you've transplanted mature plants or grown new ones from seed, harvesting kale indoors is easy. Begin harvesting when leaves are about 4-6 inches long. Use the "cut-and-come-again" method: snap or cut the outer, lower leaves first, leaving the central growing point and smaller inner leaves to continue producing. This encourages continuous growth and ensures a steady supply throughout the winter.
Occasionally, you might encounter issues. Yellowing lower leaves often indicate overwatering or a nutrient deficiency. Adjust your watering schedule and consider a liquid feed. Leggy growth (tall, thin stems) is usually a sign of insufficient light; move your plant to a brighter spot or increase grow light intensity/duration. Keep an eye out for common indoor pests like aphids or spider mites, which can be managed with organic insecticidal soap or neem oil.
Conclusion
Don't let the promise of a rough winter intimidate you or signal the end of your fresh vegetable supply. By taking proactive steps to move your established kale plants indoors or by starting new ones from seed, you can defy the cold and enjoy the vibrant, nutritious benefits of homegrown kale all season long. It takes a little effort, but the joy of harvesting crisp, green leaves while snow falls outside is an unparalleled reward. Embrace the challenge, and you’ll discover that your indoor garden can be a thriving oasis, proving that with a bit of care, a truly rough winter is no match for your determination and your beloved kale.