Keep Kale Harvests Coming: Winter Indoor Growing Secrets
As the vibrant hues of autumn fade and the chill of winter creeps in, many gardeners resign themselves to a barren season, eagerly awaiting spring's return. But what if you could defy the frosty grip of winter and continue to enjoy fresh, homegrown greens? The secret lies in understanding how to keep your garden's bounty thriving, even when the thermometer plummets. Specifically, for hard-working greens like kale,
moving kale indoors for a rough winter isn't just possible, it's a game-changer that ensures a continuous supply of nutrient-rich leaves long after the outdoor garden has called it quits.
Imagine harvesting crisp kale for your salads, smoothies, and stir-fries while snow blankets the ground outside. This guide will reveal the simple yet effective strategies to transition your kale plants from the garden to a cozy indoor environment, ensuring they not only survive but thrive, providing you with fresh produce throughout the colder months.
Why Bring Your Kale Indoors This Winter?
The decision to move your kale plants indoors is often driven by the forecast—the ominous whispers of an "extra cold, rough winter" can be enough to spur action. Early cold snaps, persistent nights in the 20s, or even age-old folk predictions like the appearance of a white woolly bear caterpillar, all signal that harsh conditions are on their way. While kale is famously cold-hardy and can withstand significant frost, extreme or prolonged freezing temperatures, especially in colder climates, can eventually spell the end for even the toughest varieties.
Beyond mere survival, there are compelling reasons to cultivate kale indoors:
- Uninterrupted Freshness: Enjoy homegrown, pesticide-free kale when outdoor options are non-existent and store-bought alternatives might be expensive or less fresh.
- Budget-Friendly: Eliminate the need to purchase costly organic kale bunches from the grocery store, saving money while boosting your health.
- Nutritional Powerhouse: Kale is packed with vitamins A, C, and K, as well as antioxidants. Having a fresh supply means you can consistently incorporate this superfood into your diet.
- Gardening Satisfaction: There’s immense satisfaction in nurturing plants and harvesting fresh produce during the depths of winter, keeping your green thumb active year-round.
- Optimal Adaptation: Unlike some delicate greens, kale's natural resilience makes it surprisingly adaptable to cooler indoor temperatures, requiring less fuss than you might expect.
By proactively
moving kale indoors for a rough winter, you're not just saving plants; you're investing in your health, your wallet, and your gardening joy.
Preparing for the Big Move: Digging Up Your Outdoor Kale
The transition from outdoor garden bed to indoor container requires careful planning and execution to minimize shock and ensure your kale plants continue to flourish. The key is to be gentle and thoughtful throughout the process.
Timing is Everything
Monitor local forecasts. When consistent night temperatures drop into the low 30s or 20s, and certainly before the ground freezes solid, it’s time to act. You might notice lower leaves beginning to show signs of stress or yellowing—a clear signal that your kale is nearing its outdoor limit.
Essential Tools
Gather your tools before you begin: a sharp shovel or spade, appropriately sized pots (one per plant, or a vertical growing system if you have many), and a high-quality potting mix.
The Excavation Process
This is the most critical step.
- Water Your Plants: A day or two before the move, thoroughly water your kale plants. This helps keep the root ball intact and reduces transplant shock.
- Careful Digging: With your shovel, begin digging around the perimeter of the kale plant, at least 6-8 inches away from the main stem. Dig deeply and slowly, creating a wide circle around the plant. The goal is to extract as much of the root system as possible without tearing or damaging it.
- Root Preservation: As you dig, if you feel resistance from a root, gently trace it with your hands and try to dig it out carefully. The more intact the root system, the better your plant's chances of survival indoors.
- Lift and Inspect: Once loosened, gently lift the entire plant, root ball and all, from the ground. Inspect the roots for any signs of damage or disease.
Replanting in Containers
Choose containers that are at least 8-10 inches deep and wide enough to accommodate the root ball comfortably. Kale has a moderately deep root system, so avoid shallow trays. Ensure your chosen pots have ample drainage holes to prevent waterlogging.
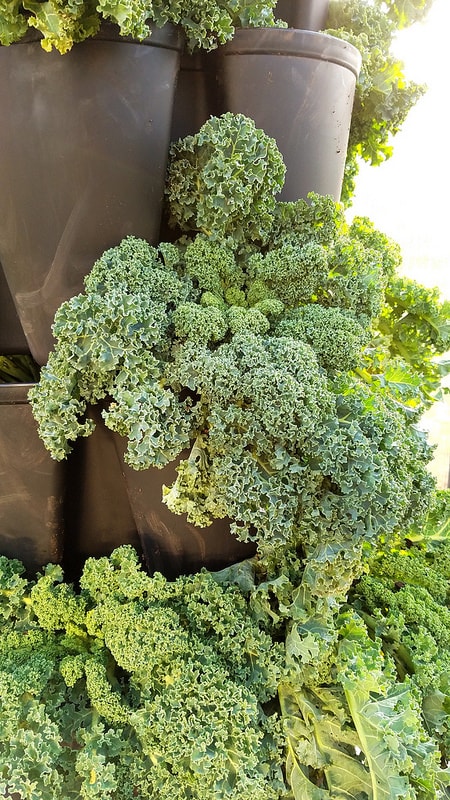
Fill the pot with a good quality, well-draining potting mix. Place the kale plant into its new pot, ensuring the roots are completely covered, mimicking its original planting depth in the garden. Gently firm the soil around the base of the plant. Water thoroughly immediately after repotting to help settle the soil and hydrate the roots. If you have many plants, consider innovative solutions like a vertical growing system, which can efficiently house numerous kale plants in a compact footprint, just like the GreenStalk system mentioned in our reference. For more detailed insights on year-round kale cultivation, check out
Grow Fresh Kale All Winter: Your Indoor Survival Guide.
Cultivating Success: Indoor Care for Thriving Kale
Once your kale plants are safely indoors, a few environmental adjustments and consistent care routines will ensure they flourish.
Light Requirements
Light is paramount for indoor plants. Place your kale in the brightest spot available in your home—a south-facing window, a bright patio door, or a sunroom are ideal. If natural light is limited (which is common during short winter days), consider supplementing with a grow light. A simple LED grow light on a timer for 12-14 hours a day can make a significant difference in growth and leaf quality.
Watering Wisely
Indoor kale generally needs less water than its outdoor counterpart, but consistency is key. Water weekly, or when the top inch of soil feels dry to the touch. Always check the soil moisture before watering to avoid overwatering, which can lead to root rot. Ensure excess water can drain freely from the bottom of the pot.
Temperature and Humidity
Kale is a cool-season crop, so it appreciates cooler indoor temperatures, ideally between 50-70°F (10-21°C). Avoid placing plants near heat vents or drafty doorways. Indoor air can be dry during winter; occasional misting or placing the pots on a pebble tray filled with water can help increase humidity around the plants.
Feeding and Harvesting
Your potted kale plants will gradually deplete the nutrients in their potting mix. Consider feeding them every 3-4 weeks with a diluted, balanced liquid fertilizer, following the product instructions.
Kale is a "cut-and-come-again" vegetable. Harvest the outer, larger leaves first, leaving the inner, younger leaves to continue growing. Avoid taking more than one-third of the plant's leaves at a time to ensure continuous production. This method encourages the plant to produce new growth, providing you with a steady supply throughout winter.
Pest Management
Even indoors, plants can attract pests. Regularly inspect your kale plants for common houseplant pests like aphids, whiteflies, or spider mites. Address any infestations quickly with organic solutions like neem oil or insecticidal soap to keep your harvests healthy and pest-free.
Starting Fresh: Growing Kale from Seed Indoors
If you don't have existing outdoor kale plants, or simply wish to expand your indoor garden, growing kale from seed is an excellent alternative. It allows you to select varieties specifically suited for indoor container growth.
Picking the Right Variety
For indoor success, opt for compact, fast-growing varieties. Look for "dwarf" or "container-friendly" tags on seed packets. Excellent choices include:
- Dwarf Blue Curled Kale: Compact, dense, and ideal for pots.
- Red Russian Kale: Features tender leaves with attractive reddish-purple veins.
- Lacinato (Dinosaur) Kale: Long, narrow, textured leaves, perfect for continuous harvesting.
- Dwarf Siberian Kale: Thrives in cooler temperatures and small containers.
Seed Starting Steps
Start seeds in small trays or pots filled with a sterile seed-starting mix. Plant seeds about ½ inch deep. Keep the soil consistently moist and provide warmth (70-75°F / 21-24°C) for optimal germination. Once seedlings emerge and develop a few true leaves, thin them to the strongest plant per spot, or transplant them carefully into their final, larger containers (8-10 inches deep) with good quality potting mix. Place them under bright light or grow lights immediately to prevent legginess.
A Winter Harvest Awaits
Don't let the colder months bring an end to your gardening endeavors. By proactively
moving kale indoors for a rough winter, or by starting new plants from seed, you can ensure a consistent supply of fresh, organic, and highly nutritious greens right from your home. The effort involved in transplanting and caring for your kale is a small price to pay for the joy and health benefits of homegrown produce all season long. So, take action now, secure your winter harvest, and enjoy the ongoing bounty of your resilient kale plants. If you're pondering whether to act before the frost bites too hard, consider this:
Rough Winter Ahead? Move Your Kale Indoors Now!